I’ve got a 2015 MacBook Air with an Intel i5-5240U processor featuring 4 cores, 4 GB of RAM, and a 128 GB hard drive. Although I’ve always updated it to the latest versions of macOS (something that’s becoming increasingly complicated due to limited disk space), I made the mistake of installing macOS Monterey. This caused the MacBook to become terribly slow—to the point where I barely used it… it became nothing more than a paperweight.
The installation and usage experience with Ubuntu has improved a lot since the last time I tried it about six or seven years ago. The process is super simple and effective. Thanks to Ubuntu, my laptop has regained its speed! Now I’ll walk you through the installation process step by step:
Prerequisites
-
The old laptop/desktop and a bit of motivation.
-
An USB drive of at least 8 GB (in my case, I used a 128 GB one, which is more than enough).
Step-by-Step Installation of Ubuntu
1. Download Ubuntu: First, download the Ubuntu image from its official website. You can do this from the same laptop (if it’s still usable) or from another computer, as I did. Which version should you choose? I recommend the latest LTS (Long-Term Support) version, which guarantees 5 years of maintenance and security updates. I installed Ubuntu 24.04 LTS.
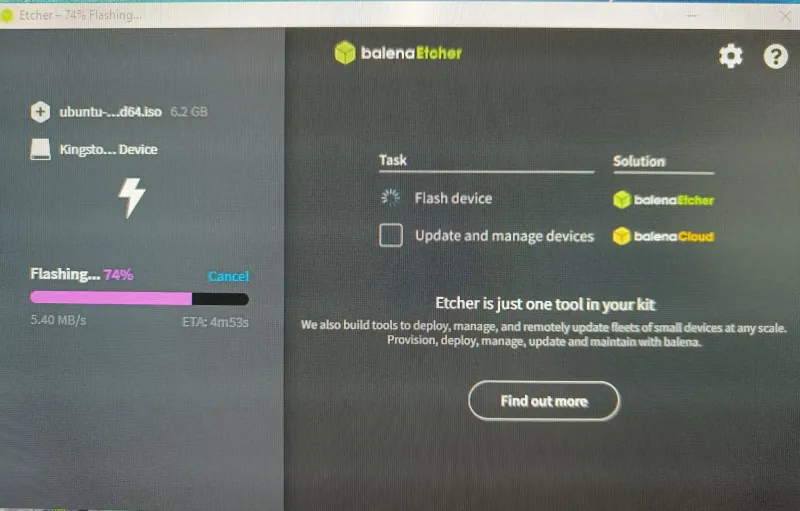
2. Create a Bootable USB: The downloaded image is in .iso format, which is a disk image. To create the bootable USB on Windows, I used the program Balena Etcher, which is simple and effective. This software basically follows three steps:

- Select the image: Click on “Flash from file” and choose the .iso file you downloaded.
- Select the destination drive: Make sure to choose the USB drive and not your computer’s hard drive.
- Start the process: Verify that everything is correct and click on “Flash”. The writing and verification may take a few minutes.
Installing Ubuntu on the MacBook
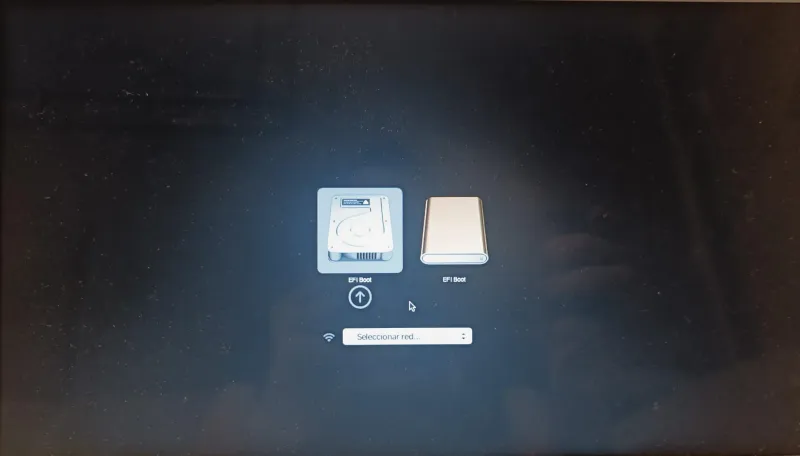
1. Boot from the USB Drive: Connect the USB drive to the MacBook (which should be turned off), and turn it on while holding down the Option/Alt (⌥) key. The recognized boot disks will appear, and you must select the USB drive icon.
2. Try Before Installing: Once Ubuntu starts, it offers you two options: “Try” or “Install Ubuntu”. I recommend choosing “Try” to check if it recognizes all the important drivers. In my case, it recognized everything! From the backlit keyboard to the trackpad, WiFi, and the special keys.
3. Install Ubuntu: When you’re ready, click on the installation icon that appears on the Ubuntu desktop. The process is completely guided and very intuitive. You only need to choose the language, keyboard layout, and time zone. After a few minutes, Ubuntu was installed and ready to use.
Results and Conclusions
And voilà! My MacBook Air is alive again. With Ubuntu, its performance is much smoother, boot times are fast, and the user experience is excellent. Although I couldn’t compare the performance directly because I didn’t run tests before formatting macOS, I assure you that the change is incredible: the laptop flies!
So, if you have an old computer and think that your only option is to recycle or throw it away, consider installing Linux. You can give it a second life with Ubuntu, Mint, or any other distribution. My recommendation is Ubuntu, because as I’ve mentioned, the process was simple and the result, fantastic.
See you next time!